You won't throw out burned out light bulbs in the trash again
リアクション
2026年08月06日
#DIYRepair #LEDBulb #HomeHacks
💡✨ Put a piece of medicine packaging on the bulb and never throw away burnt-out bulbs again!
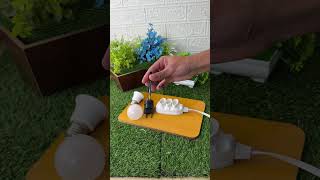
Stop wasting money buying new light bulbs all the time! This amazing homemade trick shows you how to use a piece of aluminum from an empty pill blister pack to create a quick and efficient fix for LED bulbs that have stopped working. By combining tweezers, electrical tape, and the blister pack aluminum, you will easily repair the bulb's circuit. Simple, practical, and very cheap!
👇 Follow this easy step-by-step recipe:
🧪 Ingredients:
💡 Quick LED Repair Kit
• 1 "burnt-out" LED light bulb
• 1 pair of metal tweezers
• Electrical tape
• 1 utility knife (or a small pointed knife)
• 1 pair of scissors
• 1 empty pill blister pack (just the aluminum part)
🥣 Instructions:
🌿 Preparing the Repair
1️⃣ Remove the acrylic cover (the white bulb) from the light bulb by twisting or pulling carefully
2️⃣ Wrap the tips of the metal tweezers with electrical tape to insulate them and prevent shocks
3️⃣ Screw the bulb into a socket and, with the insulated tweezers, touch the two little metal points on each small LED chip (one by one) to test them
4️⃣ When the whole bulb lights up, you've found the burnt-out LED! Mark it with a pen
5️⃣ With the bulb disconnected from power, use a utility knife to scrape off and completely remove the burnt-out LED you marked
6️⃣ With the scissors, cut a very small piece of aluminum from the pill blister pack, in the exact shape of the removed LED
7️⃣ Stick this little piece of aluminum onto a piece of electrical tape
8️⃣ Stick the tape with the aluminum exactly over the spot where the burnt-out LED was scraped off, making sure it makes contact
🏡 How to Use:
• Test and Use: Screw the bulb back into the socket and flip the switch. The bulb will instantly start working again! Pop the acrylic cover back on and use the bulb normally in any room of your house.
✨ Why It Works:
✔ LED bulbs operate on a "series" circuit, which means if just one single LED chip burns out, the entire bulb goes dark
✔ The tweezers with electrical tape allow you to test the circuit safely, creating a temporary "bridge" that lets the power skip over the broken LED
✔ Scraping off the burnt LED clears the space to remake the electrical connection
✔ The aluminum from the pill blister pack is an excellent conductor of electricity. When secured with the electrical tape, it creates a permanent new bridge, restoring the circuit and making the bulb light up again
💬 Let me know in the comments what city you're watching from and if you're going to try this trick to fix your light bulbs today!
🔎 Keywords:
fix led bulb, burnt out light bulb, pill blister pack hack, save energy, easy diy repair, electrical hacks, save money, magic mixture, viral home recipes, home hacks, bright home
📌 Hashtags: #DIYRepair #LEDBulb #HomeHacks #DIYHacks #MoneySaving #DoItYourself #EasyFix #LifeHacks #ViralTip
💡✨ Put a piece of medicine packaging on the bulb and never throw away burnt-out bulbs again!
Stop wasting money buying new light bulbs all the time! This amazing homemade trick shows you how to use a piece of aluminum from an empty pill blister pack to create a quick and efficient fix for LED bulbs that have stopped working. By combining tweezers, electrical tape, and the blister pack aluminum, you will easily repair the bulb's circuit. Simple, practical, and very cheap!
👇 Follow this easy step-by-step recipe:
🧪 Ingredients:
💡 Quick LED Repair Kit
• 1 "burnt-out" LED light bulb
• 1 pair of metal tweezers
• Electrical tape
• 1 utility knife (or a small pointed knife)
• 1 pair of scissors
• 1 empty pill blister pack (just the aluminum part)
🥣 Instructions:
🌿 Preparing the Repair
1️⃣ Remove the acrylic cover (the white bulb) from the light bulb by twisting or pulling carefully
2️⃣ Wrap the tips of the metal tweezers with electrical tape to insulate them and prevent shocks
3️⃣ Screw the bulb into a socket and, with the insulated tweezers, touch the two little metal points on each small LED chip (one by one) to test them
4️⃣ When the whole bulb lights up, you've found the burnt-out LED! Mark it with a pen
5️⃣ With the bulb disconnected from power, use a utility knife to scrape off and completely remove the burnt-out LED you marked
6️⃣ With the scissors, cut a very small piece of aluminum from the pill blister pack, in the exact shape of the removed LED
7️⃣ Stick this little piece of aluminum onto a piece of electrical tape
8️⃣ Stick the tape with the aluminum exactly over the spot where the burnt-out LED was scraped off, making sure it makes contact
🏡 How to Use:
• Test and Use: Screw the bulb back into the socket and flip the switch. The bulb will instantly start working again! Pop the acrylic cover back on and use the bulb normally in any room of your house.
✨ Why It Works:
✔ LED bulbs operate on a "series" circuit, which means if just one single LED chip burns out, the entire bulb goes dark
✔ The tweezers with electrical tape allow you to test the circuit safely, creating a temporary "bridge" that lets the power skip over the broken LED
✔ Scraping off the burnt LED clears the space to remake the electrical connection
✔ The aluminum from the pill blister pack is an excellent conductor of electricity. When secured with the electrical tape, it creates a permanent new bridge, restoring the circuit and making the bulb light up again
💬 Let me know in the comments what city you're watching from and if you're going to try this trick to fix your light bulbs today!
🔎 Keywords:
fix led bulb, burnt out light bulb, pill blister pack hack, save energy, easy diy repair, electrical hacks, save money, magic mixture, viral home recipes, home hacks, bright home
📌 Hashtags: #DIYRepair #LEDBulb #HomeHacks #DIYHacks #MoneySaving #DoItYourself #EasyFix #LifeHacks #ViralTip